• Home
  • About Us
  • Blogs
  • Home
  • About Us
  • Blogs

Android Penetration Testing Lab Setup with DIVA

On This Page

AI-Powered Cyberattacks: The New Era of Intelligent Cyber Warfare

This guide explains how to set up an Android penetration testing environment using MEmu Play Emulator, ADB, Frida, Objection, and the DIVA (Damn Insecure and Vulnerable App) application. The content below follows the original workflow without changing the process.

Step 1 – Download and Install MEmu Play

Download MEmu Play Emulator:

https://www.memuplay.com/

Install the emulator normally and launch it once after installation.

Step 2 – Install Android ADB Platform Tools

Download and install Android ADB Platform Tools.

Copy the ADB folder to:

C:\Microsoft\

After copying, add the ADB directory to the Windows Environment Variables (PATH) so that ADB commands can be executed from any terminal.

Step 3 – Install Python

Download and install the latest version of Python for Windows.

During installation, make sure Add Python to PATH is enabled.

Step 4 – Install Frida and Objection

Open Command Prompt and install the required tools.

Install Frida:

pip install frida

Install Frida Tools:

pip install frida-tools

Install Objection:

pip install objection

Step 5 – Check Emulator CPU Architecture

Verify the Android architecture before downloading the Frida Server.

Run:

adb shell getprop ro.product.cpu.abi

Example output:

x86_64

Your emulator or physical device may return a different architecture such as:

  • x86
  • x86_64
  • arm64-v8a
  • armeabi-v7a

Download the Frida Server that matches the reported architecture.

Step 6 – Rename the Frida Server

The downloaded file usually has a long filename similar to:

frida-server-16.x.x-android-x86_64

Rename it simply to:

frida

This makes future commands easier.


Important Note

The following setup remains exactly the same whether you are using:

  • MEmu Play
  • Any other Android Emulator
  • A physical Android device

Only the architecture may differ.

Step 7 – Verify Connected Device

Check whether your emulator or phone is connected.

adb devices

Example:

List of devices attached
127.0.0.1:21503    device

Step 8 – Open Android Shell

adb shell

Once inside the shell, Android/Linux commands can be executed exactly like a Linux terminal.

Step 9 – Push Frida Server

Open Command Prompt inside the folder containing the renamed frida file.

Push it to the Android device.

adb push frida /data/local/tmp

Step 10 – Install the DIVA Application
Download the DIVA APK:

https://github.com/0xArab/diva-apk-file

Install it by simply dragging and dropping the APK into the MEmu emulator.


Understanding frida-ps

frida-ps is a Frida CLI utility used to list running processes.

The ps stands for Process Status, similar to the Linux ps command.

It displays processes that Frida can attach to for instrumentation.


frida-ps Command Options

List local machine processes

frida-ps

Displays running processes on your Windows machine.


List processes on a connected Android device

frida-ps -U

Shows processes running on the connected Android device.

Note: Frida Server must already be running.


List all Android applications

frida-ps -Ua

Displays all foreground and background applications.


Show applications with detailed information

frida-ps -Uai

Flags:

  • U → USB/ADB connected device
  • a → List installed applications
  • i → Show additional information such as package name and process ID

Before Running Frida

Ensure the following:

  • USB Debugging is enabled.
  • Device is detected with:
adb devices
  • Frida Server version matches the installed Frida package on your PC.
  • Frida Server is running on the device.

After that, execute:

frida-ps -Uai

This displays all installed applications along with package names and process information.


Frida CodeShare Scripts

Browse available Frida scripts here:

https://codeshare.frida.re/@fdciabdul/

Example command:

frida --codeshare dzonerzy/fridantiroot -U -f jakhar.aseem.diva

This launches the DIVA application while injecting the selected Frida script.


After Restarting the Emulator or Device

1. Start the Emulator

Open MEmu Play (or your Android device).

Verify that the DIVA application is still installed.


2. Check Device Connection

adb devices

If the device appears in the list, the connection is successful.


3. Start Frida Server Again

Frida Server stops automatically after every reboot.

Restart it manually.

adb shell
su
cd /data/local/tmp
./frida-server &

If you are using a rooted emulator such as rooted MEmu, this step is required after every restart.


4. Verify Frida Connection

Run:

frida-ps -U

If the application list appears, Frida is connected successfully.


5. Hook the Target Application

Execute:

frida --codeshare dzonerzy/fridantiroot -U -f jakhar.aseem.diva

The DIVA application will launch with the Frida script injected.


Quick Restart Checklist

After every emulator or device restart:

  1. Start the emulator or Android device.
  2. Verify the connection.
adb devices
  1. Start Frida Server.
adb shell
su -c ./frida-server &
  1. Test the connection.
frida-ps -U
  1. Launch DIVA with the Frida script.
frida --codeshare dzonerzy/fridantiroot -U -f jakhar.aseem.diva

DIVA Lab

The first vulnerability to practice is the Insecure Design challenge available in the DIVA application.


View DIVA Logs

To monitor DIVA logs in real time, run:

adb logcat | findstr diva

This filters Android Logcat output and displays only log entries related to the DIVA application.

Hardcoded Sensitive Data (Insecure Design)

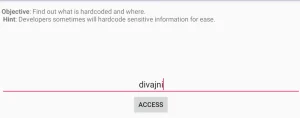
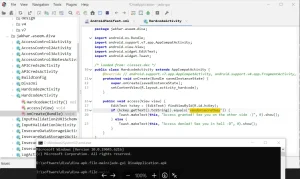
If sensitive information is hardcoded inside the application, anyone can extract it by decompiling the APK. This is considered an Insecure Design issue because confidential data should never be embedded directly into the application’s source code.

One example is the Hardcoded Number Activity, where sensitive information is stored within the application code instead of being securely managed.

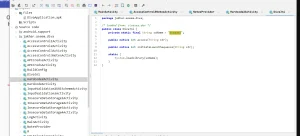
To analyze the APK, open Command Prompt in the directory where the DIVA APK is located and run:

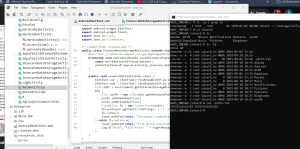
jadx-gui DivaApplication.apk

This command opens the APK in JADX GUI, allowing you to browse the decompiled Java source code.

After navigating through the application’s source code, the hardcoded key can be located, demonstrating how attackers can easily recover embedded secrets from an APK.

Insecure Data Storage

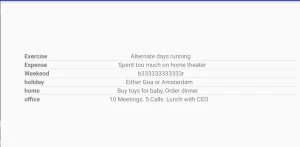
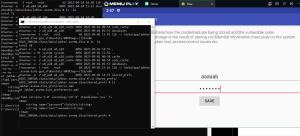
In this challenge, we check whether the application stores sensitive data securely. If the stored data can be easily accessed or read by an attacker, it is considered an Insecure Data Storage vulnerability.
Insecure Data Storage – Part 2

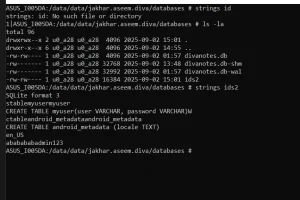
In this challenge, the sensitive data is not visible directly. We need to inspect the application’s stored data. Since the application stores its information in an SQLite database, we use the strings command to search for readable data inside the database file.
Insecure Data Storage – Part 3

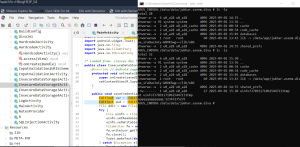
In this part, we review the application’s source code to identify where the credentials are stored. The code shows that the credentials are saved under uinfo, which helps us locate and view the stored data.

Insecure Data Storage – Part 4

In this part, we navigate to the SD card directory because the source code indicates that the application’s data is stored there. We access this location to verify and view the stored data.

Next Input validation part 1

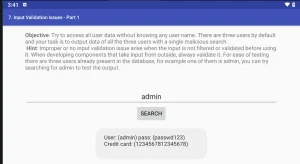
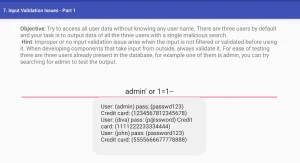
SQL Injection

In this challenge, the application already contains a predefined admin user. We first verify the username, then use it as input to test whether the application is vulnerable to SQL Injection by injecting SQL payloads into the admin field.

SQL Injection – Source Code Review

In this part, we review the application’s source code. The code contains comments that help us understand how the SQL query works and where the SQL Injection vulnerability exists.

Input Validation part 3

Insecure Data Storage – Source Code Verification

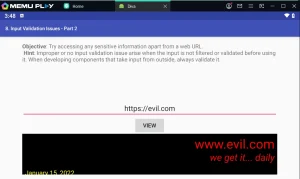
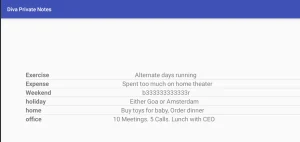
In this part, we access the file using its URL because it is mentioned in the application and also referenced in the source code. We first identify where the data is stored, then verify it through the source code to confirm the storage location.

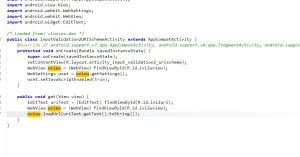
source code

How Did We Know We Needed to Test URLs?

Two things clearly indicate that URL-based input should be tested:

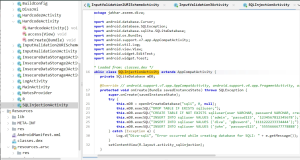
  • The source code directly passes user input to WebView.loadUrl().
  • The activity name is InputValidation2URISchemeActivity, where URI Scheme suggests that URL schemes such as http://, file://, and javascript: are expected.

Based on this, we test the following payloads:

  • javascript: payload
  • file:// payload
  • http:// payload (phishing/open redirect testing)

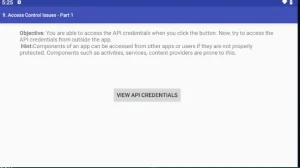
Access Control Issue – Part 1

In this challenge, we simply check the application’s credentials to understand how access control is implemented and identify whether unauthorized access is possible.

Access Control Issue – Part 2

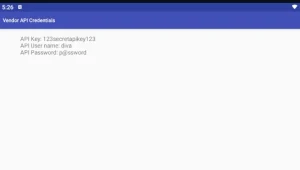
To directly open the API Credentials Activity, we use the following ADB command:

adb shell am start -n jakhar.aseem.diva/.APICredsActivity

This command launches the APICredsActivity screen directly, allowing us to view the API credentials exposed by the application.

Access Control Issue Part 2

Access Control Issue – Part 3

Run the following command:

adb shell am start -a jakhar.aseem.diva.action.VIEW_CREDS2 --es check_pin true

This opens the page where the application asks for credentials or a PIN.

Next, run:

adb shell am start -a jakhar.aseem.diva.action.VIEW_CREDS2 --es check_pin false

By setting check_pin to false, the application bypasses the PIN verification and opens the screen that displays the saved credentials.


Access Control Issue – Part 4

In this part, we enter a random PIN and tap Enter to observe how the application validates the input and handles the authentication process.

Find Endpoint or Secret – Part 1

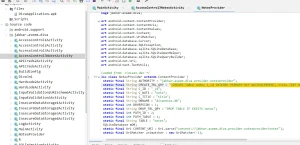
In this part, we review the application’s source code. We found the endpoint in the Uri.parse() method, which shows the URI used by the application. This helps us identify the endpoint for further testing.

Find Endpoint or Secret – Part 2

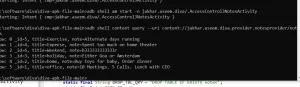
After identifying the endpoint, we determined that an ADB content query would be required. We searched for the appropriate command and found a useful reference on Stack Overflow, which provided the command needed to query the Android Content Provider.

Reference:

https://stackoverflow.com/questions/27988069/query-android-content-provider-from-command-line-adb-shell

Find Endpoint or Secret – Part 3

After running the command, the output matched the information we had already identified in the application. This confirms that the Content Provider returned the same data successfully.

Hardcoding Issue – Part 2

In this part, we simply review the application’s source code to identify hardcoded values. The source code reveals where the sensitive information is embedded within the application.

Input Validation Issues – Part 3

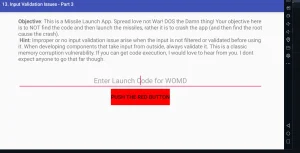
In this part, we verify that the application does not enforce proper input validation. There is no limit on the input length, so we enter a very large value. The application crashes and returns to the home screen, indicating that the input was not properly validated.

Are You Worried About the Cybersecurity of Your Business?

Fill out the form below and we’ll get back to you.